The Call: A GE Monogram Built-In Leaking From the Water Line
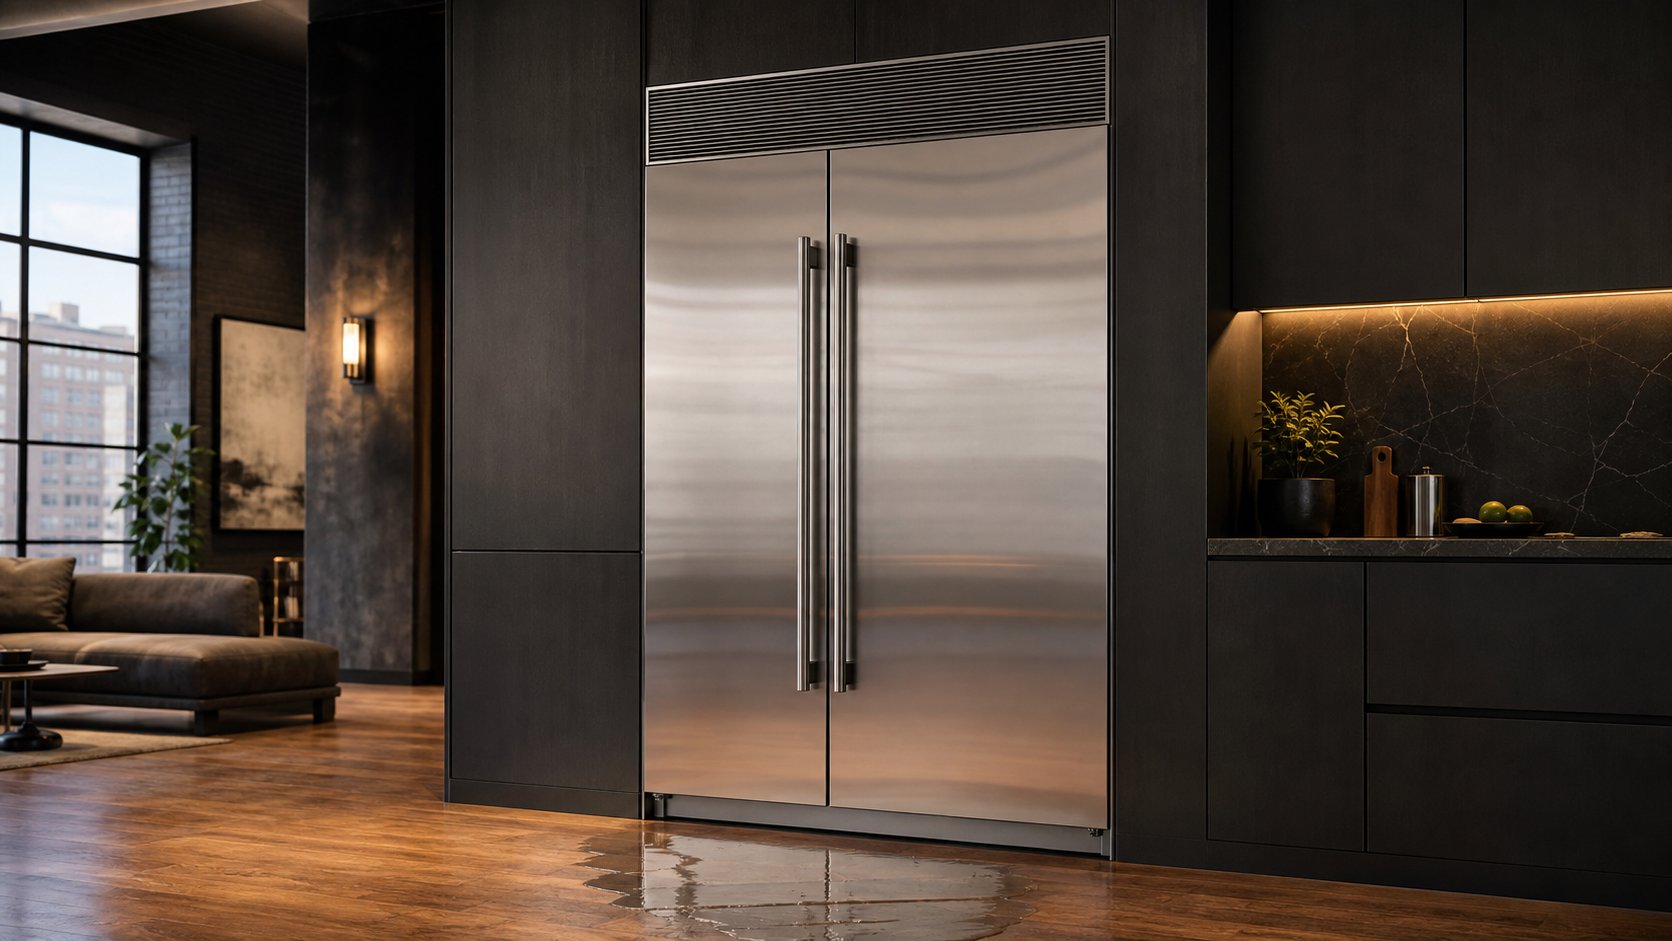
This job came in as a classic water leak GE refrigerator case: a GE Monogram side-by-side, built directly into cabinetry in a loft-style kitchen. The homeowner noticed water collecting near the base of the unit, but because the fridge sits flush against the wall and cabinetry with almost no side clearance, there was no way to trace the source without pulling the entire unit out.
That’s the part most online troubleshooting guides skip over: on a freestanding refrigerator, you can tip it forward and look underneath in five minutes. On a built-in model like this Monogram, the water line runs a longer path behind the cabinetry to reach the rear inlet valve, and diagnosing a leak means a full, careful extraction first.
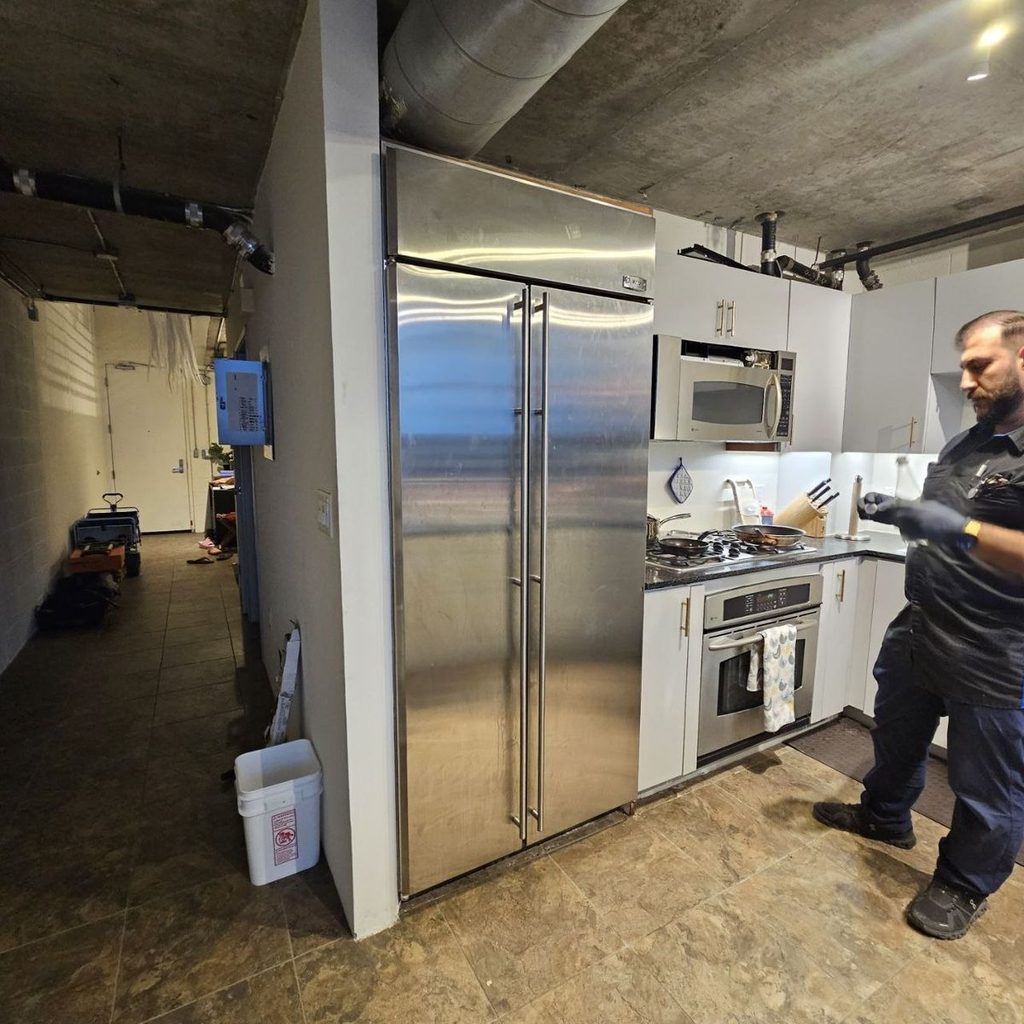
Step 1: Full Unit Extraction
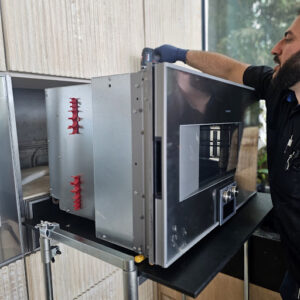
Before anything could be inspected, the refrigerator had to be disconnected and carefully pulled forward out of its cabinetry enclosure, a slow process on a unit this size, since built-in models are secured tightly on all sides with almost no play. Protective boards were placed under the feet to slide the unit out without scratching the stainless finish or the flooring.
Once extracted, the full rear panel and water line routing were finally visible, something that’s simply not possible to inspect with the unit in place.
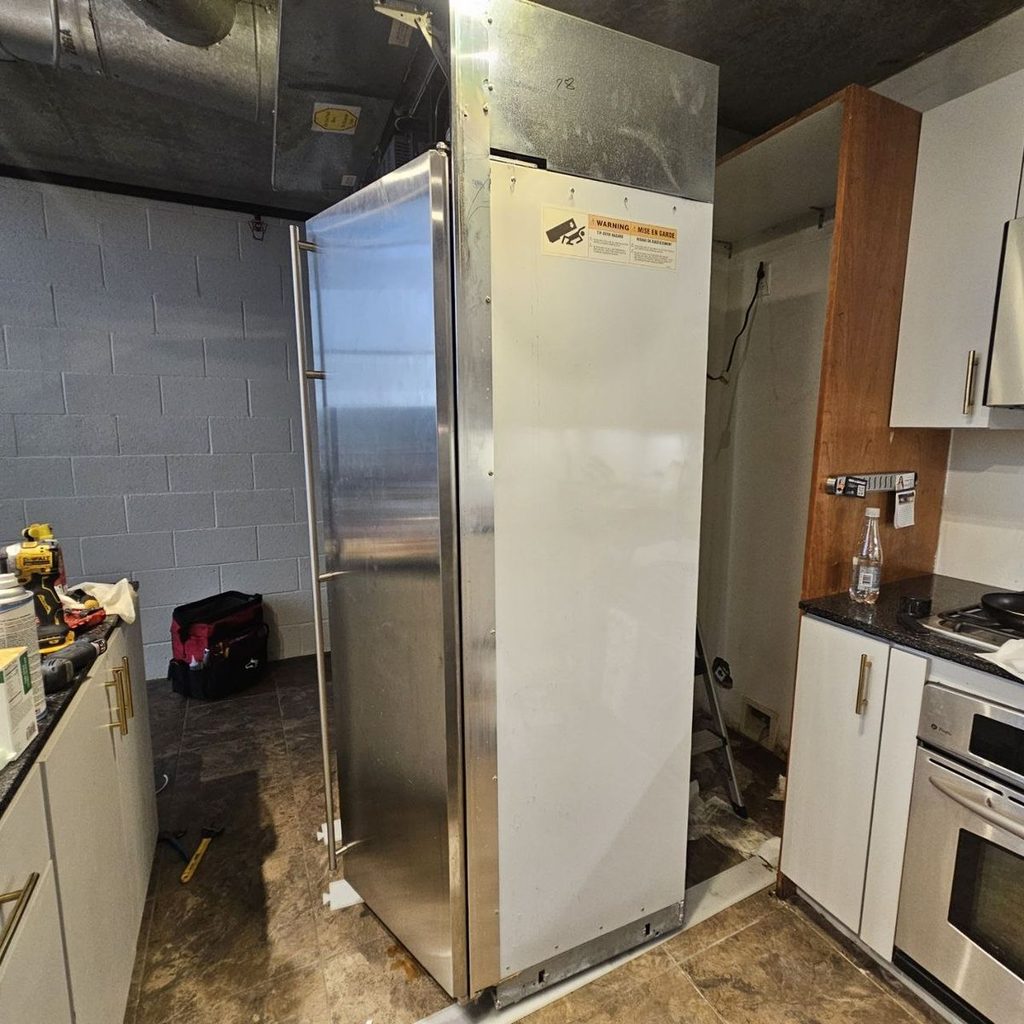
Step 2: Tracing the Water Line
With the unit pulled out, the technician traced the water supply line from the shutoff valve, through the cabinetry, back to the refrigerator’s rear inlet valve, checking every fitting along the way. This is the single most important step in any built-in water leak GE refrigerator diagnosis, because a leak can originate anywhere along that path, not just at the fridge itself.
In this case, the leak was traced to a loose connection where the line met the fitting behind the cabinetry, a common failure point on built-in installations, where vibration and the longer line run put more stress on connections than on a standard freestanding fridge.
Step 3: Repairing the Connection
Once the exact leak point was isolated, the fitting was resealed and properly secured. (When the tubing itself is cracked or kinked rather than just loose, the fix is a full section replacement instead of a reseal, worth knowing if you’re diagnosing your own leak and find visible damage to the line rather than just a loose fitting.)
Before putting anything back together, the line was pressure-tested with water running through it to confirm the leak was fully resolved, not just quieted down. Skipping this step is how “fixed” leaks come back within a week.
Step 4: Careful Reinstallation
The final and honestly most delicate part of the job was sliding the refrigerator back into its cabinetry enclosure, leveling it, and checking that both doors sat flush and aligned with the surrounding cabinets. On a built-in installation, a millimeter of misalignment is visible immediately, so this step took as much care as the repair itself.
The result: a fully sealed water line, a refrigerator reinstalled flush with zero gaps, and no more water reaching the floor.
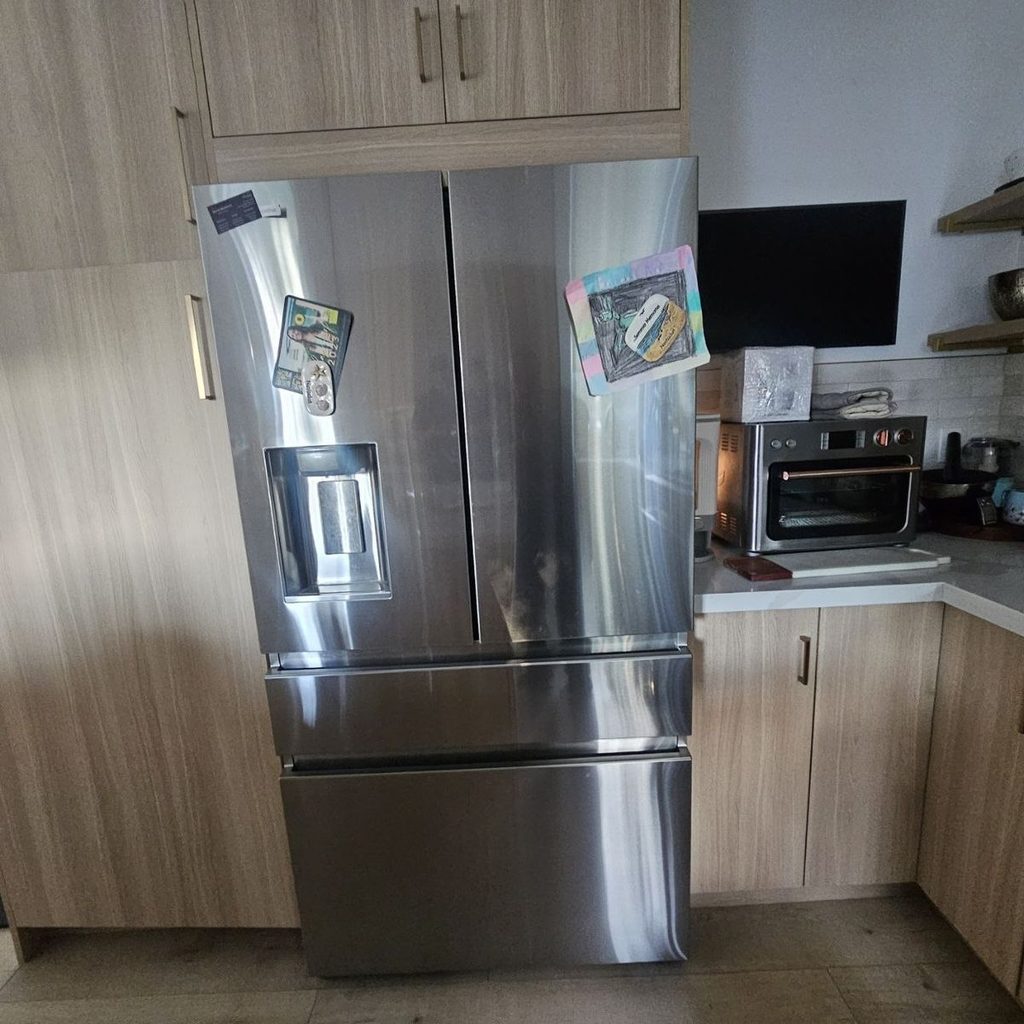
Why This Matters Beyond the Fridge Itself
A slow water leak GE refrigerator problem on a built-in unit isn’t just an appliance issue; it’s a flooring and cabinetry issue waiting to happen. Water trapped under a flush-mounted refrigerator can sit against subflooring and cabinet bases for weeks before it’s ever visible on the surface, by which point you’re looking at a repair bill that includes flooring and cabinetry, not just the fridge.
Other Common Causes of a Water Leak GE Refrigerator Owners Run Into
Not every case is a water line issue like this one. If your GE refrigerator is leaking, here’s the full list worth checking, based on where the water shows up.
Water Pooling Inside the Fridge or Freezer
This points to the defrost drain, not the water line. The drain hole sits at the back of the freezer compartment, near the bottom, and channels condensation down to a drip pan under the unit. When it clogs with debris or freezes over, water backs up and overflows inside the compartment.
Fix: Locate the drain hole, clear any visible debris, and flush it with hot water to melt any ice blockage.
Water Inside and Underneath the Unit
This combination usually means the drain is overflowing at the source while also leaking through a crack in the drain trough or pan on the way down; still a drain issue, just a further-along one.
Fix: Clear the drain as above, then inspect the drain pan and trough underneath for cracks, a cracked pan needs replacing, not patching.
Water Spreading Across the Floor
Larger amounts of water spreading out, rather than a small contained puddle, points toward the water line side, exactly what we found on the Monogram case above: a loose fitting, a cracked water tank assembly, or a failed inlet valve.
Fix: Trace the line from the shutoff valve to the inlet valve, tighten any loose fittings, and replace the tank or valve if either shows cracking.
Leaking Only When Using the Water or Ice Dispenser
If the leak only shows up during or right after dispenser use, check the water inlet valve and the filter housing/filter head for hairline cracks. This is a pressure-triggered leak, which is why it’s easy to miss when the fridge is just sitting idle.
Fix: Replace the filter and check its seal is fully seated; if the leak continues, the filter housing or inlet valve itself likely needs replacing.
GE Profile Leaking Under the Deli Drawer
On many GE Profile models, the defrost drain trough sits directly above the deli drawer area, so a clogged drain shows up as water pooling right under that specific drawer rather than spread across the whole compartment.
Fix: Remove the deli drawer, locate the drain trough directly above it, and clear any clog before it overflows again.
Side-by-Side Models Leaking on the Floor
Side-by-side units split the water line to serve both the ice maker and the dispenser, creating more connection points where a leak can start, worth checking the splitter fitting and both ends of the inlet valve connection specifically.
Fix: Check the splitter fitting first, since it’s the most common point of failure on split-line side-by-side models.
Leaking From the Top
This is less common and usually isn’t a true leak; more often, it’s condensation forming on top of the cabinet from poor ventilation, especially on built-in models installed flush with limited airflow around the top.
Fix: Improve airflow around the top of the unit if possible; if it’s an actual drip rather than condensation, that points to an overhead-routed line needing professional inspection.
GE Monogram Leak From Water Line and Maintenance: Preventing It From Happening Again
Fixing the leak is only half the job; a GE Monogram leak from the water line and maintenance routine go hand in hand, since built-in units are far more prone to repeat leaks than freestanding models if the water line isn’t checked periodically. Here’s how to fix it for good and keep it that way:
- Inspect the water line connection annually. On built-in models, have the fitting behind the cabinetry checked once a year, even if there’s no visible leak; loose connections build up gradually from vibration.
- Replace the water filter on schedule. An old, stiff filter puts more strain on the filter head seal and inlet valve, making cracks more likely.
- Check for it after any appliance move. If the fridge has ever been pulled out for cleaning or a nearby renovation, the water line connection should be re-checked; this is exactly how the loose fitting in our case study likely developed.
- Watch for early signs before it becomes a full leak: a slightly damp cabinet base, a faint drip sound, or reduced ice maker output are all early indicators worth acting on before water actually reaches the floor.
If your GE Monogram water line is leaking again after a previous fix, or the refrigerator repair isn’t holding, that usually means the original fix addressed a symptom rather than the root cause – worth having a technician re-trace the full line rather than just resealing the same spot again.
If you’re searching for a Monogram leak and have a dishwasher rather than a refrigerator, the cause is different: dishwasher leaks are most often traced to the pump and motor assembly, a worn door seal, or a faulty electronic control board, not the water line. Worth confirming which appliance is actually leaking before
When It’s a DIY Fix vs. When to Call Someone
Clearing a clogged defrost drain or replacing a visibly torn door gasket are reasonable DIY jobs. But if you’re dealing with a built-in model, a suspected water line connection issue, or a water tank/inlet valve that needs replacing, that’s when it’s worth having a technician handle it, especially on a flush-mounted unit like the Monogram above, where extraction and reinstallation alone require real care to avoid damaging cabinetry or the unit’s finish.
Reasonable DIYClearing a clogged defrost drain Replacing a visibly torn door gasket Replacing the water filter |
Better With a TechnicianBuilt-in / flush-mounted models Suspected water line connection issues Water tank or inlet valve replacement |
FAQ About Water Leak GE Refrigerator Repair
What usually causes a water leak GE refrigerator problem on a built-in model?
Most often, a loose or damaged connection along the water line running through the cabinetry to the rear inlet valve — the exact issue in the case above.
Why is my GE refrigerator leaking water inside?
Almost always a clogged or frozen defrost drain, located at the back of the freezer compartment near the bottom.
Why is my refrigerator leaking water all over the floor?
Larger amounts of spreading water usually point to the water line, a loose fitting, a cracked water tank, or a failed inlet valve – rather than the defrost drain.
Can a water line leak affect the ice maker?
Yes – the same inlet valve that leaks also supplies the ice maker, so reduced ice production alongside a leak is a strong signal.
Do I need to pull my refrigerator out of the cabinetry to fix a built-in leak?
In most cases, yes. Built-in models need to be carefully extracted to access the rear water line; there’s no way to trace the leak source with the unit still in place.
How do I stop a fridge water line from leaking?
Isolate the exact fitting or section that’s leaking, reseal or replace it, then pressure-test the line before putting the fridge back – resealing without a pressure test is the most common reason a “fixed” leak comes back.
How often should GE Monogram water line maintenance be done?
An annual check of the water line connection is enough for most households, plus a re-check any time the fridge has been moved, or nearby cabinetry work was done.
Dealing With a Water Leak That Won’t Quit?
CityFix Appliance handles exactly this kind of repair across the greater Los Angeles area – from diagnosis through full reinstallation.
| BOOK ONLINE | (818) 937-1818 |